Showing posts with label glass. Show all posts

Monday, November 7, 2011

Vitrine: Beach Glass


Last year while visiting the historic waterfront town of Port Townsend, WA, I heard rumors of a stretch of shore so famed for excellent beachcombing that it had come to be known as "Glass Beach". I set out from downtown in search of a spot to match my optimistic mental vision: pale sands strewn with Japanese glass fishing floats, studded with cobalt chunks of patent medicine bottles.


Hours later I had found anemones, kelp, detached crab claws, and even a gumshoe chiton, but no glass. Tired and discouraged, I flopped down on a stretch of sand and looked out at the grey waters of the Strait of San Juan de Fuca.

When I finally turned my attention back to the beach, I saw that I was surrounded by tiny pieces of glass. In 15 minutes of pecking and hunting I garnered a small pile of pebbles--amber, green, clear, and, rarest of all, cobalt (perhaps Port Townsend was never big on patent medicines?).
Other than their color, these tiny bits barely hint at their former forms, being so much closer to sand itself than to anything that ever held liquids or sliced unsuspecting feet.

Thursday, September 29, 2011

Penland Educators' Retreat


North Carolina's Penland School of Crafts has exerted a huge influence on me ever since I first attended a workshop in the summer of 1997. When I look back on the pieces I've made at Penland--however crude, however experimental--I can see dozens of little kernels that eventually grew into my "real" work. What would I be making now if it weren't for Penland?

Over the years, I've been a work-study student (washing dishes), a scholarship recipient, a studio assistant, and, finally, an instructor: Penland was where I taught my very first wood jewelry class, back in 2007.

And now I've had the thrill of experiencing Penland from yet another perspective, as a participant in the 2011 Craft Educators' Retreat. When I opened the email inviting me to apply it was almost like getting one of those "YOUR NAME HAVE WON 60000GBP" messages. A week in the woods with 100 other teachers, talking and learning and teaching in any of a dozen well-equipped studios? Too good to be true!

It was a whole lot of silver lining stuffed into one small dark cloud: my inability to attend three demos simultaneously. Other than that and self-imposed sleep deprivation it was an overwhelmingly positive experience. I deeply believe that one of the most important qualities a teacher can possess is indiscriminate generosity, and this week hammered that idea home. Not only was I surrounded by people who are at the top of their game, they were unanimously willing to spill their secrets, whether in scheduled demos or informal tutorials sparked by a lunchtime chat.


Mark Gardner taught woodturning and Stoney Lamar shared his signature surface texturing and finishing technique (that's metalsmith Suzanne Pugh looking on).


Sculptor Sabiha Mujtaba (my awesome roommate) showed us how to transfer a design from model to block in preparation for power carving. Dean Pulver wowed silversmith Julia Woodman with an impromptu demo of the "Ming Ding".


Sculptor Critz Campbell shared a low-tech trick for steam-bending wood, and I ventured out of the wood studio to see papercut artist Béatrice Coron's overview of materials and tools.


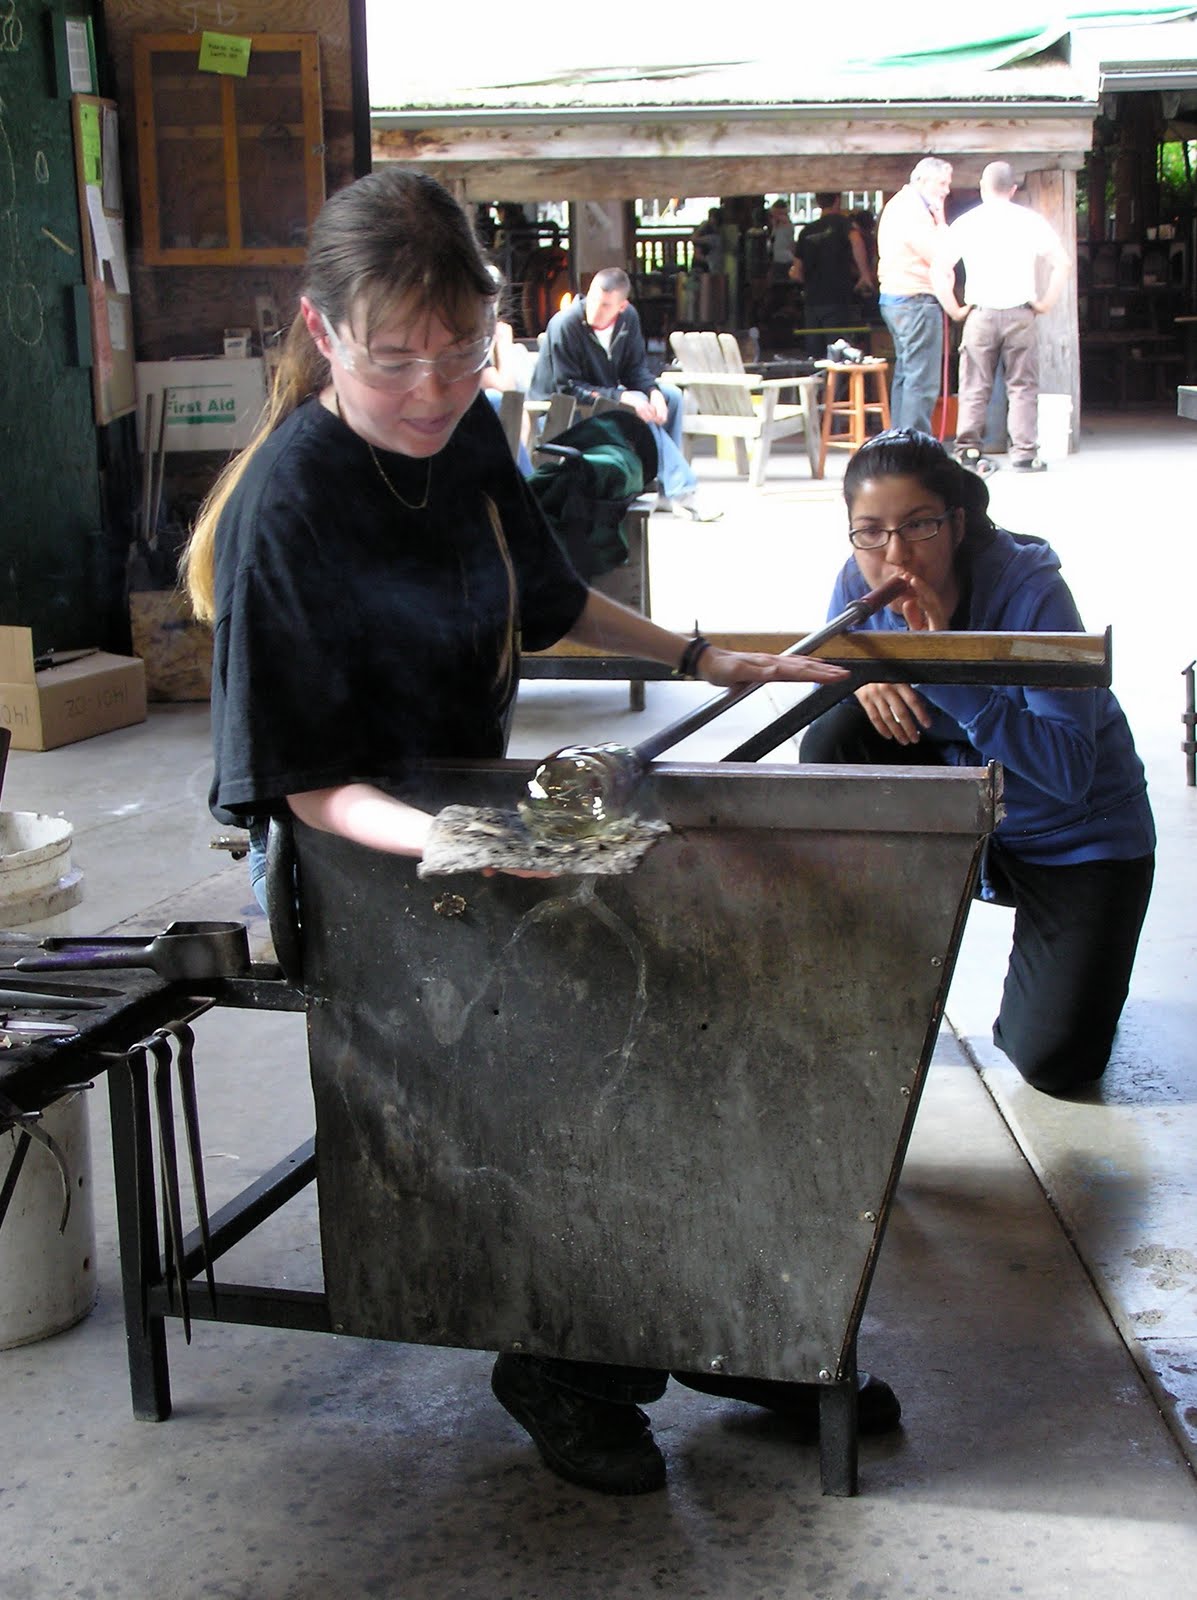
Perhaps even more inspiring than the expert instruction was seeing the experts take a risk on trying something new. The hotshop schedule quickly filled up as teachers like master blacksmith Jim Cooper jumped at the chance to blow some glass.


I hadn't blown since last year, but to my surprise some of the skills I accumulated at Pilchuck came back to me, while the overriding anxiety didn't. Patiently coached by gaffer extraordinaire Sami Lipscomb, I made a hip flask that's a big step up from my last attempt.


I took advantage of tools I don't usually have access to and made a little progress on my ongoing doll project. Mark Gardner helped me to turn some tiny wood versions, and Ben Elliott showed me how to make similar shapes in flame-worked borosilicate glass.


And I finally got to cast some glass rings that I'll eventually clean up and carve into signets.


I brought along a handful of empty vitrines, which turned into mementos of this very memorable experience: a sample of Dolph Smith's "forged paper" technique reminds me to be a generous teacher, a collage of leaves and mica simulating the Penland view reminds me to me resourceful, woven shavings from Stoney Lamar's turning demo reminds me to enjoy the process as much as the product, and a set of wings removed from a squashed bee reminds me that aiming for beauty often involves overcoming squeamishness. Quite a lot of lessons from just a week in the woods!

Thank you so much to the funders, my fellow retreaters, and everyone at Penland who worked so hard to put this amazing experience together.

Saturday, October 9, 2010

Coldworking Class with Rebecca Chernow


Intro to Coldworking
Pratt Fine Arts Center

As I described in my previous post about Pilchuck, a lot of glass work takes place far from the heat and glamor of the furnace. In a "cold shop" you can cut, grind, or polish glass using tools that stay cool under a continuous stream or spray of water. Coldworking has the potential to make--or break--a work of glass art.

I spent last weekend standing in a puddle and wiping indoor rain off my glasses while learning the ins and outs of Pratt's cold shop from the excellent Rebecca Chernow. The class is a pre-requisite for being able to rent the shop as an independent user, so there were a certain number of hoops to jump through, but Rebecca kept things moving and made sure we had some time to work on personal projects. She furnished each of us with the raw materials for three projects: a square of window glass for a sandblasted coaster (below; and yes, I did blast straight through the middle by accident), a bubble to cut into a candy dish, and a solid blob that became a lens-topped paperweight (above).

Thursday, July 29, 2010

Post-Pilchuck Review


Pilchuck Glass School
Session 3, 2010


Like any savvy institution with a limited marketing budget, Pilchuck Glass School wants to know how you first heard of its existence: was it from a professor? A magazine article? A magazine ad? One of the school's own mailings? I think every printed interaction I've with Pilchuck has included these questions, and while I'd love help out, I'm useless. I honestly can't remember a time when I didn't know about Pilchuck--or a time when I didn't want to go.

Since Pilchuck was founded slightly before I was, in 1972, it's possible that I heard the word very early on. Glass artist Dale Chihuly worked with art supporters Anne Gould Hauberg and John Hauberg to establish a dedicated glass school in the midst of a vast tree farm overlooking Puget Sound (below). Chihuly and his co-horts were dedicated to the notion of working in teams, a European model not then the norm in American glass schools and studios. This approach drastically expanded the scale and scope of the work they were able to achieve, and engendered strong relationships amongst Pilchuck glassworkers and visiting artists.


My course, "Glass with Passion", was lead by Dublin-based glass artist, Róisín de Buitléar. It was geared for novices and those with limited experience, but whereas most introductory glass classes would have beginners repeating the same simple forms, Róisín wanted us to jump right in to making objects that we could engage with. She asked each of us to come to Pilchuck with three items representing three personal passions; these would be the starting point for our glass work.


Above: My class bonding during a "hayride", enjoying Pilchuck's scenic grounds from the back of a mattress-lined truck.


We began with hot casting. By impressing or carving shapes into a mixture of clay and sand, you create a form that you can then fill with molten glass ladled out of the furnace. It's also possible to add extra elements such as leaves, wire, aluminum foil, or crushed glass frit, either to the void or to the surface of the hot glass. At the point when the glass is firm but still hot, you dig it out of the sand and hustle it over to a heated annealing oven, where it will be allowed to cool down slowly so that internal stresses don't cause the glass to crack.


Left: Our amazing teaching assistants making hot casting look easy.
Cathy Chase pours and Jono Lukas cuts the stream with shears when the mold is full.
Right:
Róisín's cast bundt cakes, still piping hot.

Next, we learned to create casting molds using pieces of steel fitted together like a puzzle. As with sand-casting, the hot glass is poured into the void; then the steel has to be agitated until it sets up so that they don't fuse together permanently.


Left: One of Sam's steel-cast pieces, just after the steel forms have been removed.

Right: My sand casting of a kashigata, after extensive grinding and polishing.

From casting, we moved on to blowing. While I initially assumed that we were progressing through the techniques in order of difficulty, it soon became apparent that another factor was in play. Casting is a team effort, at least for beginners. You need helpers to open the furnace door, to clean your dribbling ladle, to fix your hat (no joke!), and so on, but because the steps are much the same each time, the help is more or less automated, and if one helper does wander off you can yell for another or muddle through.

Blowing, on the other hand, is a much more nuanced dance. Each piece is different and progresses differently; while the person "in charge" can and does give commands, it's ideal if the assistant can anticipate them--at least to the degree of being on the right side of the bench for whatever is coming next. By the time we started blowing, my classmates and I knew each other well enough to develop this kind of communication.


Left: Jono advises as Annie attaches a punty to Erica's piece.

Right: Tamsin shapes her piece with wet newspaper as Tatiana gives it a little air.


The whole undertaking was very difficult for me. Strength, coordination, timing, unflappability, a high pain threshold, pithy communication--none of these qualities are nurtured by my everyday life or required by the kind of work I normally do.


So I decided to try for "simple", making bell jars to place over the small figures I've been carving lately. As I gained experience, they got larger, and thinner, and more regular. Then I gained just enough experience to get cocky and make a big mistake. I blew out a jar that was my largest and thinnest by far; putting it back into the glory hole to heat it for a final round of shaping, I let it get too hot and as I watched it collapsed in on itself. As I pulled it out, my teammates shook their heads: better to break it off and start again. But I reminded myself that I was there to learn, not to be perfect, so I blew it back out, shaped it it the best I could, and put it in the annealer.


That jar (above, far left) turned out to be one of my favorite pieces. It's a nice shape overall, but one wall is punctuated by an irregular scar, formed when the jar collapsed and the wall folded in on itself. It represents an all-too-rare moment when I allowed myself to act on the thought, "I wonder what would happen if...?"


I also started on a series of wood and glass doll forms, based on antique dolls that I saw in a museum several years ago. After one of our first days of glassblowing, I snuck off to the woodshop and turned a wooden doll--ostensibly so that I would have a model to work from, but really so I could feel in control for a little while. I made a few similar forms in solid glass, then got ambitious and did some hollow ones.


Many of my pieces still need to be "coldworked"--to have their sharp edges and rough surfaces ground down on wheels and sanders kept clean and cool by running water. In the meantime, I'm working out how to arrange them, and what to put inside them. Right now, they really are dolls, things that can occupy my hands while my mind plays.

Thank you to Pilchuck, to the staff and instructors, and to my comrades-in-arms! This experience will stick with me for a long time.


Glass is mighty hungry work! Check out my Sweet Travel blog to read about Pilchuck treats such as salmonberries, red huckleberries, and desserts by Holly.

Tuesday, May 18, 2010

Glass Hand


Last year I was thrilled to receive a Pratt/PONCHO scholarship, good for credit towards classes at Seattle's Pratt Fine Arts Center.  So thrilled, in fact, that I've just now gotten around to cashing some of it in.  And I'm not being at all sarcastic here; I have lifelong history of hoarding the things I value most--outgrowing unworn dresses, or letting the premium Halloween candy (precious, precious candy) molder while I wait for the "perfect" occasion to eat it.  

So I sat on my scholarship until something just too good to pass up came along: Intro to Kiln Casting with Susan Balshor.  In the past I've dabbled in both casting (bronze, silver) and glass (fusing, lampworking) but I never found a good fit for the scale and level of detail I like to work with.  Then along came leaded crystal...

As opposed to "hot casting" with ladles full of molten glass, kiln casting involves placing flowerpots full of crushed crystal on top of plaster molds arranged inside a kiln.  As the kiln slowly heats up, the glass turns to syrup, drizzling down inside the mold and filling every nook, cranny, fingerprint, and tool mark.  You just have to show up a few days later to take your nice cool mold out of the kiln, and--gently--bust the glass out of its shell.  


During the 8-week class I did a few few smaller pieces but spent most of my time prepping a wax sculpture that is just about old enough for its own driver's license.  Sometime during my sophomore or junior year of college I started making a modeled wax "portrait" of my hand, motivated, I seem to remember, by a comment my mother made when I started to get more serious about sculpting:  "Well, you'll never be a hand model now."  

Turns out she was right.  Although the hand is a sculpture rather than a life-cast, it's a pretty careful rendition (modeled finger by finger) of my right hand as it was then; next to it my hands today are notably knobbier, more scarred, and more masculine/muscular.  Funny to think, though, of all the things my hands hadn't yet done or learned when I made that model--I didn't even know how to knit yet!

I sculpted it slightly larger than life, intending to cast it in bronze (which shrinks significantly) but I didn't get around to casting it before I left college and lost access to the bronze foundry.  The wax hand kicked around in various apartment freezers before I finally left it (along with most of my worldly goods) at my parents' house while I proceeded to live out of a suitcase for years at a time.  When my parents retired and moved crosscountry, my mother somehow managed to transport the hand safely from Tennessee to Oregon.  She doesn't often ask me for work, but when she gave me the hand back a couple of years ago she expressed an interest in seeing it made "into something".  

And at long last, it has been.  It weighs a lot more now, but at least it doesn't have to live in the freezer.