Thursday, July 29, 2010

Post-Pilchuck Review


Pilchuck Glass School
Session 3, 2010


Like any savvy institution with a limited marketing budget, Pilchuck Glass School wants to know how you first heard of its existence: was it from a professor? A magazine article? A magazine ad? One of the school's own mailings? I think every printed interaction I've with Pilchuck has included these questions, and while I'd love help out, I'm useless. I honestly can't remember a time when I didn't know about Pilchuck--or a time when I didn't want to go.

Since Pilchuck was founded slightly before I was, in 1972, it's possible that I heard the word very early on. Glass artist Dale Chihuly worked with art supporters Anne Gould Hauberg and John Hauberg to establish a dedicated glass school in the midst of a vast tree farm overlooking Puget Sound (below). Chihuly and his co-horts were dedicated to the notion of working in teams, a European model not then the norm in American glass schools and studios. This approach drastically expanded the scale and scope of the work they were able to achieve, and engendered strong relationships amongst Pilchuck glassworkers and visiting artists.


My course, "Glass with Passion", was lead by Dublin-based glass artist, Róisín de Buitléar. It was geared for novices and those with limited experience, but whereas most introductory glass classes would have beginners repeating the same simple forms, Róisín wanted us to jump right in to making objects that we could engage with. She asked each of us to come to Pilchuck with three items representing three personal passions; these would be the starting point for our glass work.


Above: My class bonding during a "hayride", enjoying Pilchuck's scenic grounds from the back of a mattress-lined truck.


We began with hot casting. By impressing or carving shapes into a mixture of clay and sand, you create a form that you can then fill with molten glass ladled out of the furnace. It's also possible to add extra elements such as leaves, wire, aluminum foil, or crushed glass frit, either to the void or to the surface of the hot glass. At the point when the glass is firm but still hot, you dig it out of the sand and hustle it over to a heated annealing oven, where it will be allowed to cool down slowly so that internal stresses don't cause the glass to crack.


Left: Our amazing teaching assistants making hot casting look easy.
Cathy Chase pours and Jono Lukas cuts the stream with shears when the mold is full.
Right:
Róisín's cast bundt cakes, still piping hot.

Next, we learned to create casting molds using pieces of steel fitted together like a puzzle. As with sand-casting, the hot glass is poured into the void; then the steel has to be agitated until it sets up so that they don't fuse together permanently.


Left: One of Sam's steel-cast pieces, just after the steel forms have been removed.

Right: My sand casting of a kashigata, after extensive grinding and polishing.

From casting, we moved on to blowing. While I initially assumed that we were progressing through the techniques in order of difficulty, it soon became apparent that another factor was in play. Casting is a team effort, at least for beginners. You need helpers to open the furnace door, to clean your dribbling ladle, to fix your hat (no joke!), and so on, but because the steps are much the same each time, the help is more or less automated, and if one helper does wander off you can yell for another or muddle through.

Blowing, on the other hand, is a much more nuanced dance. Each piece is different and progresses differently; while the person "in charge" can and does give commands, it's ideal if the assistant can anticipate them--at least to the degree of being on the right side of the bench for whatever is coming next. By the time we started blowing, my classmates and I knew each other well enough to develop this kind of communication.

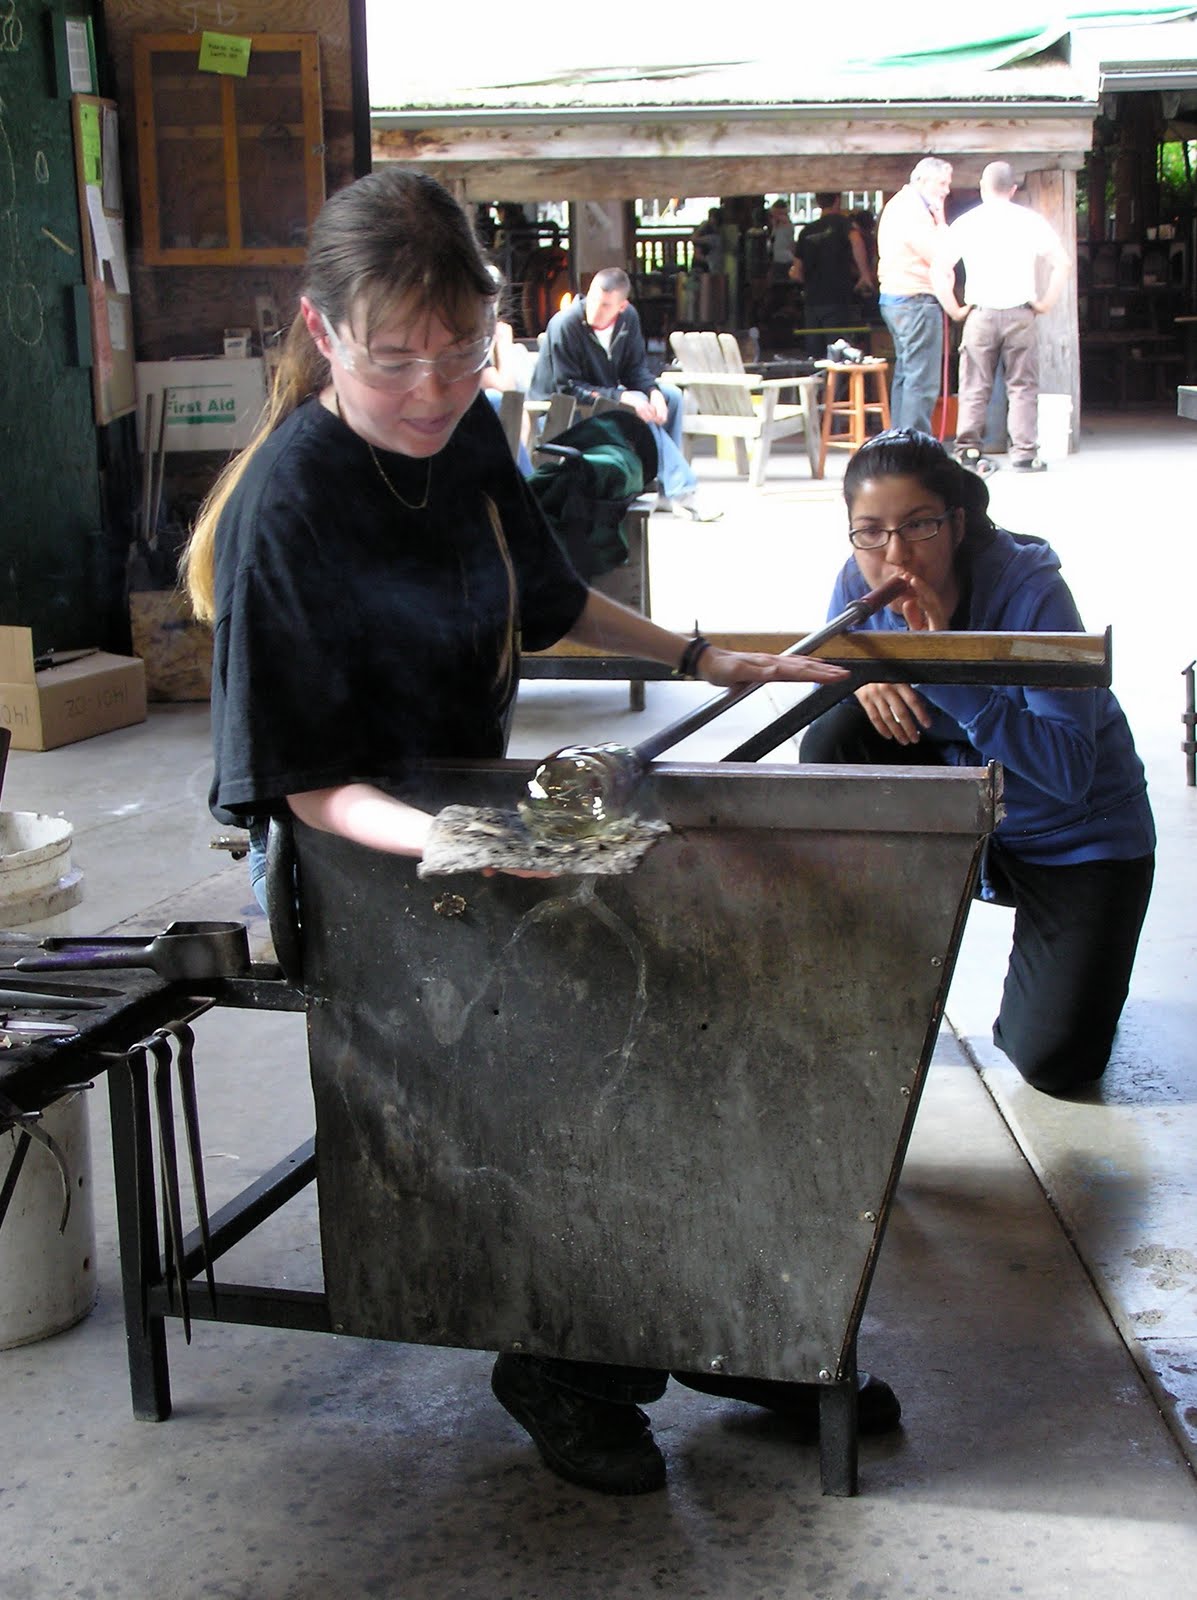


Left: Jono advises as Annie attaches a punty to Erica's piece.

Right: Tamsin shapes her piece with wet newspaper as Tatiana gives it a little air.


The whole undertaking was very difficult for me. Strength, coordination, timing, unflappability, a high pain threshold, pithy communication--none of these qualities are nurtured by my everyday life or required by the kind of work I normally do.


So I decided to try for "simple", making bell jars to place over the small figures I've been carving lately. As I gained experience, they got larger, and thinner, and more regular. Then I gained just enough experience to get cocky and make a big mistake. I blew out a jar that was my largest and thinnest by far; putting it back into the glory hole to heat it for a final round of shaping, I let it get too hot and as I watched it collapsed in on itself. As I pulled it out, my teammates shook their heads: better to break it off and start again. But I reminded myself that I was there to learn, not to be perfect, so I blew it back out, shaped it it the best I could, and put it in the annealer.


That jar (above, far left) turned out to be one of my favorite pieces. It's a nice shape overall, but one wall is punctuated by an irregular scar, formed when the jar collapsed and the wall folded in on itself. It represents an all-too-rare moment when I allowed myself to act on the thought, "I wonder what would happen if...?"


I also started on a series of wood and glass doll forms, based on antique dolls that I saw in a museum several years ago. After one of our first days of glassblowing, I snuck off to the woodshop and turned a wooden doll--ostensibly so that I would have a model to work from, but really so I could feel in control for a little while. I made a few similar forms in solid glass, then got ambitious and did some hollow ones.


Many of my pieces still need to be "coldworked"--to have their sharp edges and rough surfaces ground down on wheels and sanders kept clean and cool by running water. In the meantime, I'm working out how to arrange them, and what to put inside them. Right now, they really are dolls, things that can occupy my hands while my mind plays.

Thank you to Pilchuck, to the staff and instructors, and to my comrades-in-arms! This experience will stick with me for a long time.


Glass is mighty hungry work! Check out my Sweet Travel blog to read about Pilchuck treats such as salmonberries, red huckleberries, and desserts by Holly.

In Brent McGregor's Workshop


Rocky Mountain Timber Products

When I was in Bend a couple of months ago I had the chance to visit Brent McGregor's workshop and showroom. McGregor is a master of what is often called "rustic" woodworking--and a very patient tour guide.


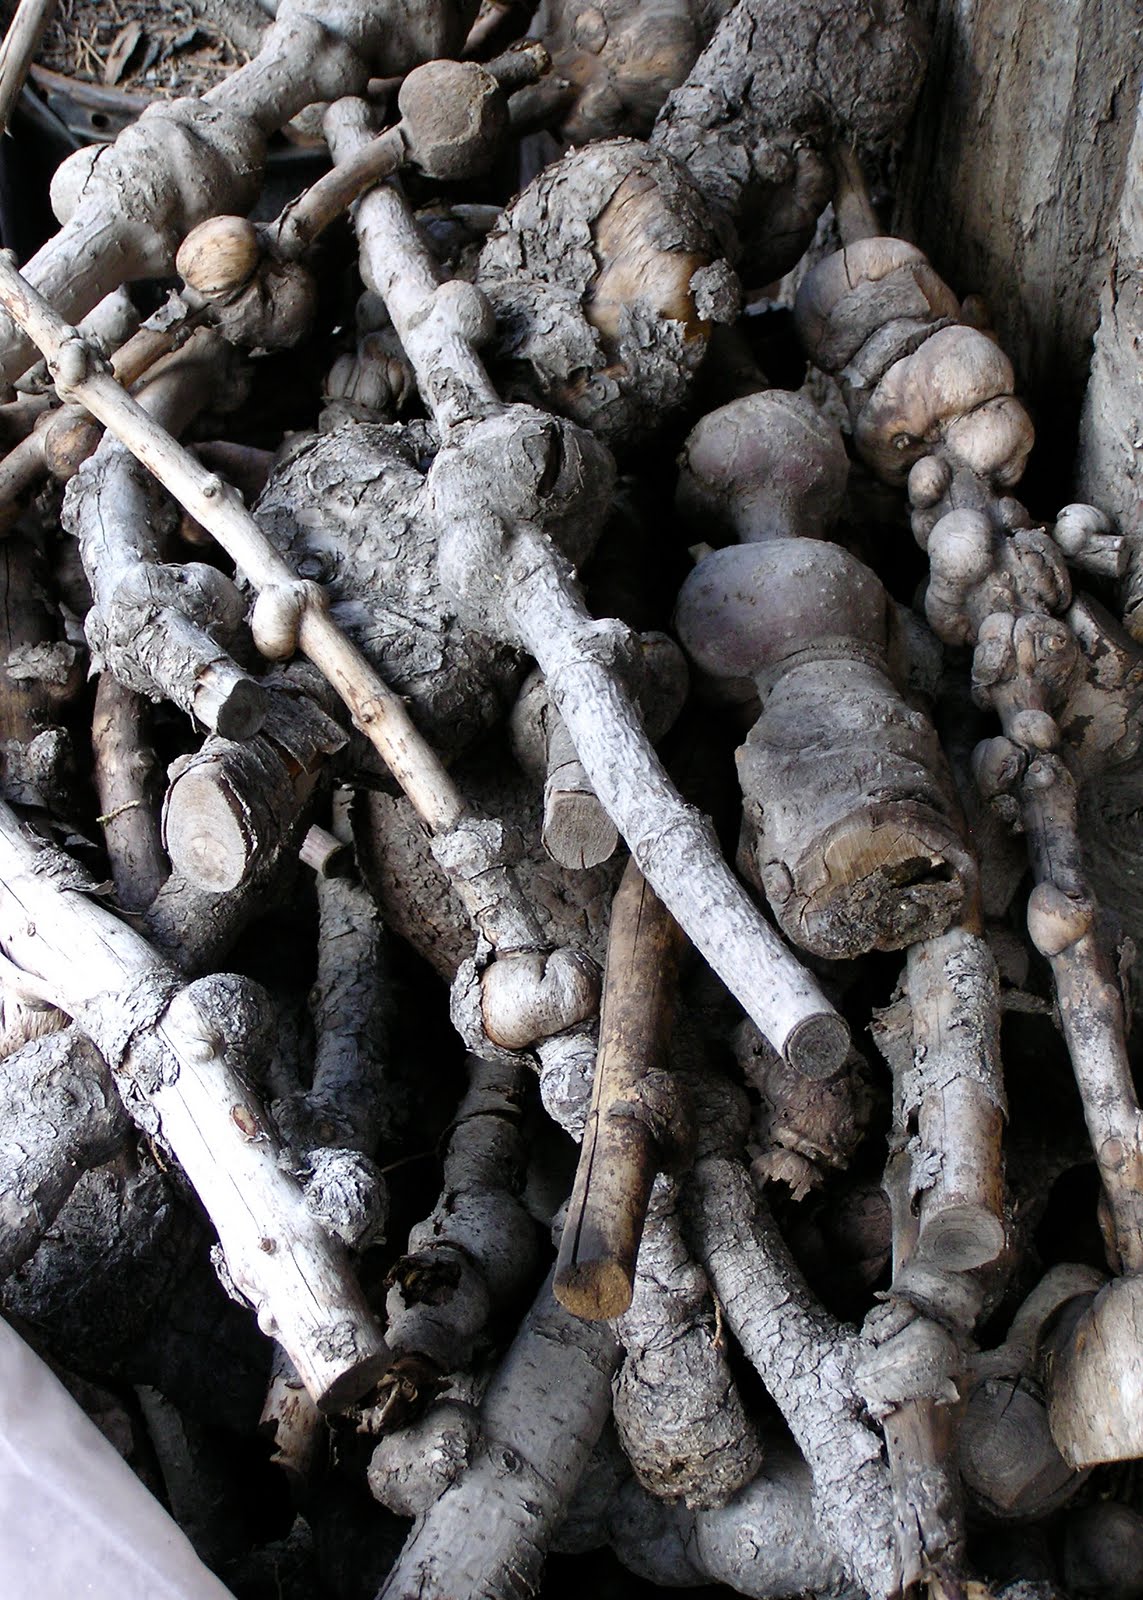
McGregor mostly works with juniper trees too twisted and irregular to be considered anything but waste by the timber industry. As a former logger himself, he has the skills needed to locate and extricate even the most isolated trees. After scouting and harvesting his materials, McGregor subjects them to a long process of stripping and finishing; his workshop (top and above) is filled with works in progress.


The showroom is stuffed to the rafters with sculpture, architectural elements, and furniture.


The outbuildings and grounds are a storage area for pieces of wood that I could happily stare at for hours--they're every bit as absorbing as those craggy stones in Zen dry gardens or on Chinese scholars' desks.

Monday, July 19, 2010

Noh Mask Carving Demonstration


One Saturday last month visitors to the Wing Luke Museum had the rare opportunity to see a live Noh performance by Nagoya's Chuuden Yuugakukai theater troupe. Noh is a type of traditional Japanese drama that features wooden masks. The intricately carved and lacquered masks transform male actors into stock characters ranging from heroes and maidens (above) to drunken sprites and vengeful crones.


Before the show, there was an even rarer opportunity to see how those masks are created. Since my entire MFA thesis work was based on Noh masks, I wasn't about to let the fact that I was scheduled to work that morning stand between me and seeing the real deal (thanks again for the shift switch, Roxanne!).

Two carvers set up shop in a small conference room for a brief demonstration of their tools and techniques. As they worked on rough but already recognizable masks, the carvers fielded questions from the crowd. As someone who got into carving relatively late in life, I was especially cheered to learn that before their second careers in Noh, both men were co-workers at an electric company.


Their masks-in-progress were the ones that most people would probably think of if challenged to imagine a Noh mask, idealized female features on a smooth, oval-shaped face. Although these faces appear simple (particularly when compared to some other masks that have horns or wrinkles or crazy expressions), their clean, refined symmetry makes them devilishly hard to carve.


In order to stick to an accepted standard, both carvers worked from photos of particularly prized masks. They used a variety of techniques to measure their progress against the model, frequently verifying their proportions with dividers and redrawing guidemarks in pencil as soon as the old ones were carved away. They also used cut paper templates to check the masks' profiles along several key cross-sections.


I was really struck by how frequently both carvers stopped to have a good look at how things were coming along. One of the most amazing things about this character's mask is that it should express different emotions depending on the tilt of the wearer's head, so the carvers made sure to check their work from various angles and in different lighting.


The hinoki (Japanese cypress) from which the masks are carved is close-grained but relatively soft, allowing the carvers to aggressively remove large amounts of material from the back and sides.


After the mask's interior and exterior are carved, another artist will apply coats of lacquer; above, the hair texture on a red-faced Shojo mask. We didn't get to see this step, but that's probably for the best since the materials are pretty toxic.


Although I've examined many Noh masks in pictures and in person, this demonstration thoroughly enriched my understanding and appreciation of the art form. The icing on the cake was the chance to experience a Noh mask from an actor's perspective (above). Although the mask was much lighter than I expected, the eyeholes were incredibly small and difficult to see through. I can only imagine the skill and training required to navigate a spotlit stage in a heavy kimono while blinkered by one of these beautiful masks!

Monday, July 5, 2010

Ring, Ring, Ring...


Now that I feel reasonably competent at carving pieces of wood into simple forms, my attention has shifted somewhat to issues of efficiency, trying wherever possible to save time, money, or effort. For example, I'm working on a number of rings that I plan to use as blanks for a casting project. Rather than carve each from a separate block of wood, I'm working on all 8 at once. The big piece is so much easier to hang on to for drilling, sawing, and carving. The chunk of scrap maple is also tapered, so each ring is a different size than its neighbors.

Friday, July 2, 2010

Pratt Teen Class Gallery


Today was the last day of my wooden jewelry class for Pratt's Teen Week: 15 hours, 5 students, ages 13 and up. We tackled techniques such as wood burning, sawing, drilling, and making findings and attachments. Here's a sample of some of the amazing work that emerged.

Saturday, June 26, 2010

Penland Auction


The annual fundraising auction for the Penland School of Crafts will take place on the weekend of August 13-14. I donated Debutante, a pearl collar with a carved and painted maple clasp and three knotted strands of cultivated pearls.

Saturday, June 5, 2010

Pratt followup

Here are a few of the pieces that emerged from my recent 8-week class at Pratt in Seattle. The schedule (6-10pm on Thursdays) proved to be more of a challenge than I had anticipated, but my students were real troopers. As usual, I was amazed that a group of people could start with the same materials, resources, and instructions, and end up with such diverse and individualistic work.

Thank you to all my students, and thanks again to everyone who helped me spread the word about this class!


Cedar necklace, plyboo earrings
Molly Simmons


Belt buckle, walnut ring
Vance Wolfe


Plyboo and pine earrings, walnut carvings (in progress)
Emily Lubahn


Maple ring (in progress)

Rebbecca Tomas

Wednesday, May 19, 2010

"Anatomy Lessons" at Taboo Studio


I have a small batch of work (including "Holler", above) in an new group show at San Diego's Taboo Studio.  "Anatomy Lessons" also includes work by Kristin Beeler, Jessica Calderwood, Diane Falkenhagen, Thomas Mann, and Christina Smith, and I'm very happy to be keeping such good company.  

The show runs through June 18, and since I won't be able to see it, I'd love feedback from anyone who does!

Tuesday, May 18, 2010

Glass Hand


Last year I was thrilled to receive a Pratt/PONCHO scholarship, good for credit towards classes at Seattle's Pratt Fine Arts Center.  So thrilled, in fact, that I've just now gotten around to cashing some of it in.  And I'm not being at all sarcastic here; I have lifelong history of hoarding the things I value most--outgrowing unworn dresses, or letting the premium Halloween candy (precious, precious candy) molder while I wait for the "perfect" occasion to eat it.  

So I sat on my scholarship until something just too good to pass up came along: Intro to Kiln Casting with Susan Balshor.  In the past I've dabbled in both casting (bronze, silver) and glass (fusing, lampworking) but I never found a good fit for the scale and level of detail I like to work with.  Then along came leaded crystal...

As opposed to "hot casting" with ladles full of molten glass, kiln casting involves placing flowerpots full of crushed crystal on top of plaster molds arranged inside a kiln.  As the kiln slowly heats up, the glass turns to syrup, drizzling down inside the mold and filling every nook, cranny, fingerprint, and tool mark.  You just have to show up a few days later to take your nice cool mold out of the kiln, and--gently--bust the glass out of its shell.  


During the 8-week class I did a few few smaller pieces but spent most of my time prepping a wax sculpture that is just about old enough for its own driver's license.  Sometime during my sophomore or junior year of college I started making a modeled wax "portrait" of my hand, motivated, I seem to remember, by a comment my mother made when I started to get more serious about sculpting:  "Well, you'll never be a hand model now."  

Turns out she was right.  Although the hand is a sculpture rather than a life-cast, it's a pretty careful rendition (modeled finger by finger) of my right hand as it was then; next to it my hands today are notably knobbier, more scarred, and more masculine/muscular.  Funny to think, though, of all the things my hands hadn't yet done or learned when I made that model--I didn't even know how to knit yet!

I sculpted it slightly larger than life, intending to cast it in bronze (which shrinks significantly) but I didn't get around to casting it before I left college and lost access to the bronze foundry.  The wax hand kicked around in various apartment freezers before I finally left it (along with most of my worldly goods) at my parents' house while I proceeded to live out of a suitcase for years at a time.  When my parents retired and moved crosscountry, my mother somehow managed to transport the hand safely from Tennessee to Oregon.  She doesn't often ask me for work, but when she gave me the hand back a couple of years ago she expressed an interest in seeing it made "into something".  

And at long last, it has been.  It weighs a lot more now, but at least it doesn't have to live in the freezer. 

Sunday, May 9, 2010

Pratt Auction


The Pratt Fine Arts Center annual auction will take place this coming Saturday at Seattle's Magnuson Park.  As far as I can tell, both tickets and volunteer opportunities are still available, and there's also a free preview the evening before.  My contribution is "Truffle", a brooch carved from German pearwood.  The catalog is full of covetable items--it's like Hammacher Schlemmer for craft lovers!

Thursday, January 14, 2010

Upcoming: 8-week Pratt Class

Starting in April, I'll be teaching an 8-week version of my "Jewelry that Grows on Trees" workshop at Pratt Fine Arts in Seattle. Here's the course description:

"Beautiful, versatile and widely available, wood is an ideal alternative material for jewelry. In this class we'll learn to make the most of wood's palate of colors and textures using tools and techniques appropriate for use in a home studio. Topics will include basic shaping and finishing, surface embellishment and creating more complex dimensional forms such as rings and cuffs. The instructor will also introduce basic carving techniques that rely on a minimum of hand tools. Prerequisite: Jewelry/Metalsmithing I or equivalent"

This will be the longest class I've taught yet, and I'm really looking forward to seeing ambitious projects and blossoming skill sets. Judging by the amazing work that comes out of a weekend workshop, I'm totally prepared to have my socks blown off and handed to me on a plate.

We'll meet on Thursdays, 6-10pm, April 1 to May 20. Students will also get FREE Friday access to the jewelry studios--perfect for all that homework I'll be assigning!

(Only kidding! Well, sort of.)

If you'd like the nitty-gritty details, go to http://online.activenetwork.com/pratt/Activities/ActivitiesDetails.asp?ProcessWait=N&aid=500
Of course, if you have any questions or concerns, feel free to e-mail them to me.

And please spread the word to anyone you know who might be interested!

3/4/10 update:
The class is a go with 6 fantastic students! Thanks so much to everyone who helped to spread the word; I am so grateful for your support. Please check back to see what we get up to...

Sunday, January 10, 2010

Generous Ring


Generous Ring

My first finished piece of the new year was brought about by something I read in People magazine probably 15 or 20 years ago. Asked to describe his accessories, Rolling Stones guitarist Keith Richards mentioned a sterling silver skull ring he wore regularly. Although skull jewelry is more usually associated with the principle of memento mori ("remember that you will die"), Richards said the ring reminded him that, "We're all the same under the skin."

Like much that I've read in People over the years (but unlike the Japanese lesson that I read only yesterday, sigh) this really stuck with me. It highlights something I find peculiarly seductive about jewelry, namely its instructive potential. While most forms of jewelry are capable of carrying a message (think slogan badges, fraternity pins, or pendants religious) rings are especially interesting because they spend so much time in the wearer's own field of vision. Say you need to remember to buy milk or pay a bill: a string tied around your finger is probably going to be a better reminder than one looped around your ankle, right?

So what do I want to be reminded of? Well, in the wake of a difficult few years, I want to keep in mind that as a rule people are kind and generous. Although my motif is admittedly heavy-handed (part claddagh, part Allstate ad) it manages to cue my memories of the innumerable people who've housed, fed, hired, supported, and encouraged me, who've taken my classes or purchased my work, who've given me a genuine smile or accurate directions. This ring also reminds me that although I may continue to depend heavily on the kindness of friends and strangers, the time to start returning those favors is now, not some fictional and far-off "good time".


[The first installment in my "repayment plan" is the photo below, which goes out to my recent and future carving students. Although I'm squeamish about showing unfinished work (I'm still not over the time someone called one of my unfinished female figures a "fattie") I think illustrates something that's crucial for any aspiring carver to know: a carving looks awful until suddenly it doesn't. Don't loose heart!]